Saturday, May 28, 2016

"Sparky" (Yellow Circle Tangle)


"Sparky" (Yellow Circle Tangle) by Megan O'Madadhain

My Yellow Circle Tangle (nicknamed "Sparky") is part of my "Rainbow Circle Tangle" series. For this series I started by tracing a circle and then used circles to define the regions. I limited myself to 3-4 colors and only used shades of one main color.


The good:

I find the pattern at the top exciting. As far as I know it is a new pattern. Basically restricting myself to a circle meant that I instantly wanted to find ways to escape it, and my "Circlecut" pattern was one way to achieve that.
My "Circlecut" pattern.
Once I added the floral pattern that looks like eyes, this tangle became an "it" to me, so I added the feet and went with it.
Adding a variant of the "Wabi" pattern made the tangle appear to have eyes.
 To me it looks like a steampunk mechanical sidekick. Something about this one makes me happy.

The bad:

I would not have added the area full of triangles if I had intended to create a mechanical creature from the start. I also would have bent the patterns on the circle so that they seemed to be on a sphere rather than a flat object. Color-wise, this is more monochromatic than I wanted; yellow is tough -- add even a tiny bit of red and it looks orange, add even a tiny bit of blue and it looks green.  I will probably do another version of this one at some point, probably with more color variation.


Art in context:

The "Rainbow Circle Tangle" series is one of my earliest attempts to do colored tangles.


The nitty gritty:

The large floral pattern is a variant of the "Wabi" pattern. The pattern of triangles is a "Kathy's Dilemma" pattern variation. Coming out of the top of "Sparky" is my "Circlecut" pattern.
My "Circlecut" pattern
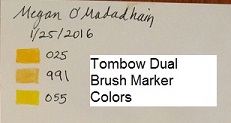
I used Tombow Dual Brush Markers and a Micron black pen, typically size "05" (0.5mm). Original is 4" x 4" ink on paper.

Sunday, May 22, 2016

Tangle Art Supplies

I first became of the Zentangle /Tangle movement while visiting a local craft store. Adult coloring books and Zentangle books are big business right now and there was a large area of the store devoted to books and supplies. I connected instantly with this style of art and thought it would be a great idea to have some form of art that I could do that didn't take up much time or space, especially since I knew that I would be less active for a few months. However, I did buy some supplies that I was unhappy with later, so for those who want a little more guidance...

Tangle Art Supply Recommendations (Short Version):

  • Black pen: Prismacolor black fine-line markers -- These are more waterproof than Micron or Sharpie pens, which is important if you like to color tangles with water-based markers. They are acid-free. I generally use size 05 (0.5mm) most of the time, with size 03 (0.3mm) for finer detail and size B (brush tip) to fill in large black areas.
  • Paper: Strathmore Artist Tiles -- I like white 4" by 4" tiles. Larger sizes take a really long time to fill up unless you do simple and/or very large patterns. A 6" by 6" tile works well with kids, in my experience, especially if you are using wider tip markers. You can also buy these in tan and black.
  • Colored Pens for adults: Tombow Dual Brush Markers if you want a lot of colors and want to experiment with color blending. Copic markers seem to be good also if blending isn't as important (I only tried them out in the store) and have the benefit of being reasonably waterproof. Sharpie permanent markers are a good option if you want a good variety of inexpensive pens.
  • Colored Pens for kids: Use "washable" markers if you must, but regular Crayola pens have much richer color. Try to get more colors than they typically get in school or add different color options. If you can trust your kid with Sharpie permanent markers, those are a good low-cost option with a good variety of colors. If your kids draw tangles in black and then color them, I recommend getting a good waterproof marker (such as a size 1 (1mm) Prismacolor black fine-line marker) to draw the patterns so that their markers won't smear the lines.
  • Pencil, pencil sharpener, eraser (Zentangle purists say not to have an eraser available -- whatever)
  • some kind of blending stub if you want to shade your tangle using pencil
  • access to some collection of tangle patterns is helpful
  • small (around 4" to 6") ruler to help plan difficult tangle patterns
  • helpful stencils. I like starting many tangles in circles (typically 3") and sometimes separate tangles by using circle stencils in some way. Letter stencils can also be helpful.

Art Supply Investigations (Long Version)

Initial Supplies

As a start I purchased two drawing books: Joy of Zentangle and Time to Tangle with Color available at my local craft store. The official Zentangle kits didn't have many pieces of paper in them and the paper looked too small to me (3" square), so instead I opted to buy some of the items separately. The books specifically recommended black Pigma Micron pens in different widths, so I bought size 01 (0.1mm), 03 (0.3mm) and 1 (1mm) to give me some options to try. These pens have the advantage of being acid free (which means they shouldn't fade over time or attack the paper they are on) and are "waterproof" (more on that later). Near the Zentangle supplies they were selling white Strathmore Artist Tiles which are also acid free, so I bought two sizes: 4" by 4" and 6" by 6". I didn't see the recommended colored pens in the store (Tombow Dual Brush Markers), so I initially skipped that. I bought a white Gelly Roll pen so I could retroactively add white over other colors or experiment with using white marker on black or tan backgrounds.

Best Black Pen

Get the best waterproof, acid-free black pen to do the tangle patterns, especially if you like to use markers (or watercolors) to color your tangles. Discovering that your "waterproof" black pen line smears as soon as you start adding color is not fun. I have not found a black pen that is 100% waterproof when you color over it with a color pen, but Prismacolor black fine-line markers are the best I've found. Definitely better than Sharpies, Micron pens, or Copic Markers. I generally use:
  • size 05 (0.5mm) for most lines
  • size B (brush tip) for filling in large areas (size 1 also works)
  • size 03 (0.3mm) for the occasional fine detail.
Even with a pen that is relatively waterproof, giving the ink at least 10 minutes to dry before coloring it or resting your hand on it (as you tangle or color another area) is a good idea.

Color Marker Comparison

When picking color markers, some considerations to keep in mind are:
  • number of available colors
  • drying speed (affects how much blending or accidental smears I get)
  • available pen widths and shapes
  • price
  • ease of replacing individual markers
  • acid-free (better for art you want to last a long time)
  • how even and clear the color is
Of course some of these are more or less important to different people. I experimented with a few different types of markers at an art store (Copic markers) and at home (Sharpie permanent markers and Tombow Dual Brush Pens). Here are some notes about each:

Tombow Dual Brush Pens
  • Expensive (currently $125 on Amazon for 96-color set, which is $1.30 each)
  • Water-based (more likely to smear on completed artwork if it gets wet, but allows more color blending, including "indirect coloring")
  • Acid-free
  • Two tip sizes on each pen
  • Small variety of colors sold individually at some art stores; buying pens individually on Amazon is expensive if you include shipping costs
  • Really expensive (currently $239.99 on Amazon for 72-color set, which is $3.33 each)
  • Alcohol-based (less likely to smear on completed artwork, but dries fast enough that color blending is difficult)
  • Some versions have replaceable nibs (points) and replaceable ink cartridges
  • Provides a color chart that shows pen colors in the context of a complete color wheel, which I admit is pretty cool.
  • Acid-free
  • Different tip sizes and chisel tips are available
  • Inexpensive (Currently $59.99 on Amazon for set of 72 colors, which is only $0.83 each
  • Alcohol-based  (less likely to smear on completed artwork, but dries fast enough that color blending is difficult)
  • Not acid-free
  • Once tip size for each pen (but you can buy pens with different tip sizes)

Finding and Organizing Tangle Patterns

Here are some suggestions for finding and organizing tangle patterns.

Finding Tangle Patterns

Here are some ways to find new tangle patterns with links to useful resources.
My "Tangle patterns" board on Pinterest.

  • If you are someone who is new to tangling or that likes step-by-step instructions, consider purchasing one or more Zentangle books (I bought Joy of Zentangle) and (Time to Tangle with Color after looking through options at a local craft store).

  • Use Pinterest to search for tangle patterns and save ("pin") any patterns you like to a board. I created a "Tangle patterns" board that you look at or follow if you want an example. (Note that in order to access Pinterest you might need to create an account.)

  • Google "tangle patterns"

  • Look at official Zentangle patterns online (may not include patterns reserved for books or classes) or look for certified Zentangle teachers in your area.

  • Buy a coloring book with tangle designs in it. One of my favorite tangle patterns I use in backgrounds is adapted from the Creative Coloring Patterns of Nature coloring book I bought.

  • Look around you! I found that after tangling for awhile I started noticing both natural and man-made patterns around me more often.

Organizing Tangle Patterns

There are many different ways of saving and organizing tangle patterns. I think there are really three main considerations to take into account: how you want to access the patterns, how much help you need with recreating steps, and how important it is to you to be able to categorize and rearrange your tangle patterns.

Pattern Binder/Portfolio

If you like having a physical copy of your patterns rather than looking them up online, consider buying a 3-ring binder or portfolio with plastic sleeves that you can put tangle patterns into. I like using a portfolio that is loosely organized by pattern category so that I can flip through and find different patterns quickly. A portfolio gives you the flexibility to categorize and rearrange tangle patterns fairly easily.

To get a good start on a pattern portfolio I printed out tangle patterns that I found online that were organized into small squares, one pattern per square (I chose to print them out on 8 1/2 inch by 11 inch paper). I didn't want huge books full of patterns to haul around and didn't feel that I needed step-by-step instructions for most patterns, so this worked fine for me. The pages of patterns that I printed came somewhat pre-organized into categories. I also created pages with blank squares so I could add additional tangle patterns and variations to the appropriate category later.
My pattern portfolio. The page on the left contains patterns I drew on a page of blank squares. The page on the right was printed from Pinterest (examples of "scale" patterns).
 I write the name of the tangle pattern below the example if I know it, which helps me look up step-by-step instructions online later if I need them.

You can also buy 3-ring binder plastic inserts that have multiple slots on each page, often sold to store things such as recipe cards (two 4 inch by 6 inch cards per page) or baseball cards (nine baseball cards on each page). Here is an example of one of my tangle patterns copied onto a small blank card that you can buy that has spaces for tangle steps on one side and room for a tangle name, example, and designer on the other. These cards are the size of baseball cards (2 1/2 by 3 1/2 inches), so may be too small for some tanglers.
My "Knotwork" tangle pattern drawn on a blank zentangle card.
You can also create your own template for saving tangle patterns or download various options on Pinterest.

Online Organization

I created a Pinterest board called "Tangle Patterns" to help me save patterns I found online. If you want minimum bulk to carry around and like to have step-by-step instructions for each pattern, this can be a good option. If organizing patterns is really important to you, you could create different boards for different categories of tangles -- whatever categories you find helpful. It is easy on Pinterest to "pin" a pattern to more than one board if you think it belongs in both "grid" and "spiral" categories, for example.
My "Tangle Patterns" Pinterest Board

Other Options

For me personally, digging through piles of tangles on cards seems cumbersome and would drive me crazy. I remember reading about someone, though, that loved putting all of their cards into a box and randomly grabbing out a card each time they did a new section of their tangle!

Another option for organizing tangles is to punch a hole in them and put them on ring clips (or even a bracelet with each tangle laminated). I generally find flipping through patterns on a ring to be annoying (especially if you have a lot of patterns on the ring), but it can be useful. I did this with a set of tangle pattern cards aimed at kids (Yoga for Your Brain Kidz Cards) so that the kids had a set of relatively easy tangle patterns that they would be less likely to lose. Since there were only a relatively small number of cards, this worked fine.
I punched holes in the corner of each "Kidz Card" and put a ring through the holes.
If you like to grab a small selections of cards to keep with you (on a trip for example), having a small subset of your collection on a ring might be a good idea.

Friday, May 13, 2016

"Orange Castle" (Orange Circle Tangle)

Orange Circle Tangle ("Orange Castle") by Megan O'Madadhain
My Orange Circle Tangle (nicknamed "Orange Castle" is part of my "Rainbow Circle Tangle" series. For this series I started by tracing a circle and then used circles to define the regions.

The good:

I like the sense of motion I feel when I look at this. I like the castle if I don't look at it too closely.

Sunday, May 1, 2016

"Flowers from Jupiter" Red Circle Tangle

"Flowers from Jupiter" (Red Circle Tangle) by Megan O'Madadhain
My Red Circle Tangle (nicknamed "Flowers from Jupiter") is part of my "Rainbow Circle Tangle" series. For this series I started by tracing a circle and then used circles to define the regions.

The good:

I like the type of flowers at the top and how they look surrounded by a pink outline.
I like the floral pattern on the left.

I had fun doing Jupiter-like patterns on the right.
The large flower in the middle is similar to ones I have been drawing on white boards all across the country for decades, so it has nostalgic value.